Wizard Step 1: Basic Info
The Basic Info section is the first step of the event wizard. After you have completed this page, you will be able to continue to the Tickets setup step and the Payment step. You will not be able to reenter the wizard after completing it, but all wizard settings will be accessible in your event dashboard in case you need to make changes.
Creating an Event: Event Information
At the top of the page, under Ticket Event Information, fill in the title of your event, select an event type from the dropdown, and add a description. You can also add an Event Start and End Time.

Event Type

The event type you choose will generate a custom banner (e.g., a golf image for a golf event) for your website. You will be able to select a different banner or upload your own later.
Event Logo
Next, add your event logo. We recommend a square image file for this. It will display in the upper left corner. 200x00 pixels is a common size.

Contact Information
Next, fill out the Contact Information for the event. This is the email address you would like participants to use if they have questions about the event.

Links
Beneath Contact Information, you are able to add links to your Facebook page or external website, which will appear on your event website in a Links section.

If you add a link, you must also add text to appear beside it on the event website. The default External URL text is “Check out our website!”, but that can be customized. On the event website, it will look like this:

Links are not required, so you can also skip them or come back to them later if you prefer.
Location
Next, you can choose whether you would like to add a street address for your event. If you do, check the box and address fields will appear.

Event Visibility and Event URL
Next, choose the visibility settings for the event. If you are not ready to publish your event, choose Draft.

Private events are only accessible to people with the event link. Public events are accessible to anyone.
Create an Event URL Identifier in the next field. A default one will be provided based on your event name, but you can edit it now. After saving changes, though, you will not be able to change this later, so ensure your spelling is correct. Do not include the date, year, or phrases such as “Second Annual” in the URL. If you renew the event in future years, you will not be able to change your URL.
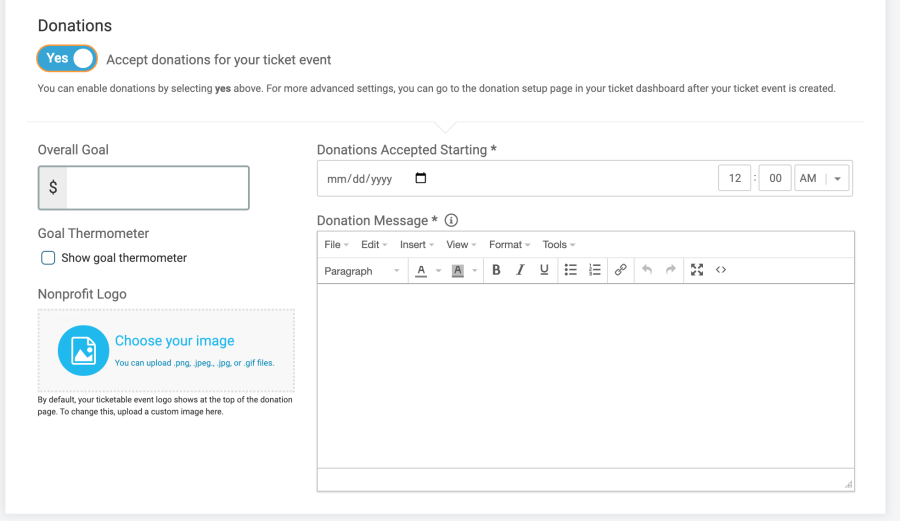
Donations
If your event collects any donations, you can enable donations. There are options to add a goal, a separate logo or image for donations, and a goal thermometer. You must enter a start date and a donation message (text to appear on the donation page) if you enable donations.
Contract
After completing these steps, read the contract at the bottom of the page, and if you agree to its terms, click the checkbox.
Then you can click Save and Continue to move to Step 2 of the event wizard. If you chose to publish your event (Private or Public visibility), it will now be accessible to the public, but ticket purchase will not be open until you set it up in the next steps.
You will NOT be able to return to step 1 of the wizard once you click Continue. Everything you have entered will be editable from your event dashboard once you complete the wizard.