Feature Your Event's Branding
Change Your Event Site's Appearance
You are able to customize the appearance of your event page by changing its colors, banner, logo, and custom wording. These options are all available through the Event Dashboard under Event>>Event Page>>Event Theme.
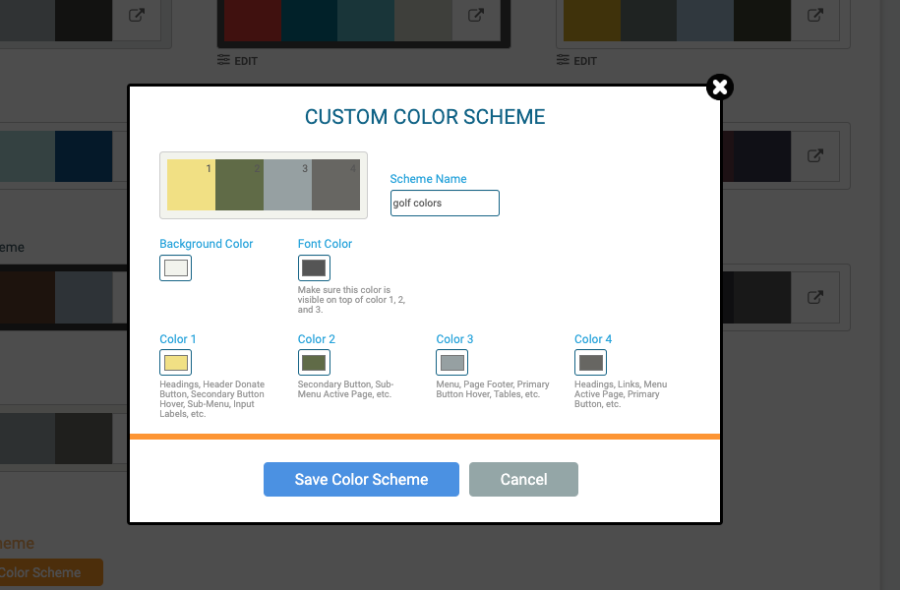
Colors
Change the colors for all the elements of your site, including the background, headings, links, buttons, and menus. There are a number of premade color schemes available for you to choose from, or you can create your own color scheme.
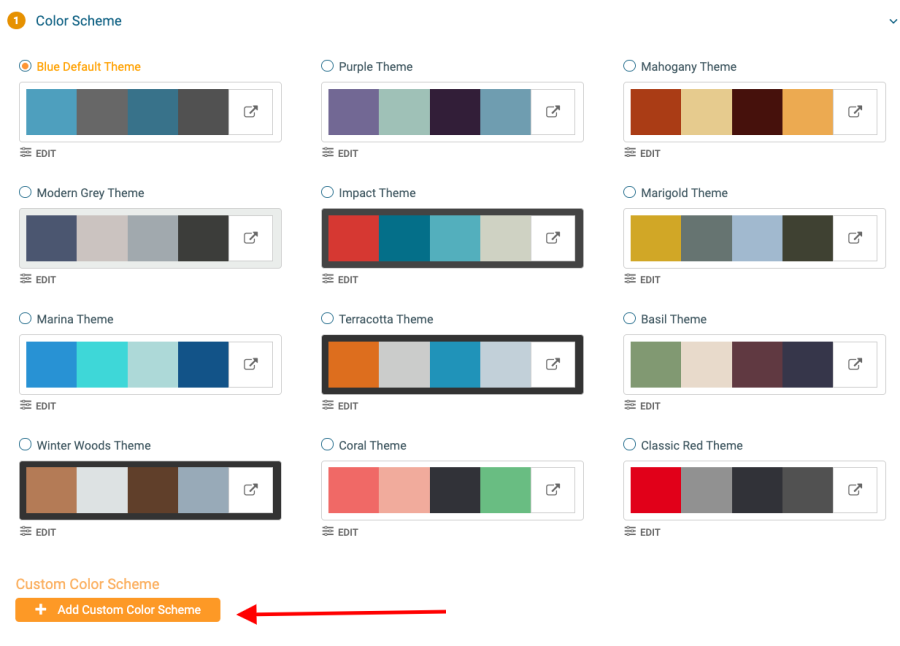
Click Edit on a color scheme to see which colors will appear on each element of your site. You can change them by clicking on the labeled boxes and selecting new ones from your computer’s color selector. When you are finished, click Save Color Scheme.
Logo
Add your logo to your event page by clicking Browse and uploading the file. Generally, circle or square logos look best. The logo will appear in the upper left corner of your site.
Banner
You can add your banner image to your event page by clicking on Browse, and selecting the correct image. If you need to remove the image entirely, then click the x next to the image, and the file will no longer be uploaded as your race logo. Be sure that the image you selected meets the image criteria of 1200px x 400px. You can upload .png, .jpeg, .jpg, or .gif files.
Or you can use one of our available banners by clicking on Select from Available Banners.
Social Media Links
Link to your nonprofit’s Facebook and Instagram accounts by entering the usernames into these fields:

They will appear on the event page as clickable icons like this:
